Baking sourdough bread at home is one of those deeply rewarding kitchen experiences that feels both simple and incredibly satisfying. With just a handful of ingredients, you can create a loaf that has a crisp crust, a soft airy interior, and that signature tangy flavor sourdough is known for.
What makes sourdough special is the process. It’s slower, more intentional, and relies on natural fermentation rather than commercial yeast. That time allows the dough to develop complex flavor and a beautiful texture that’s hard to replicate with quick breads.
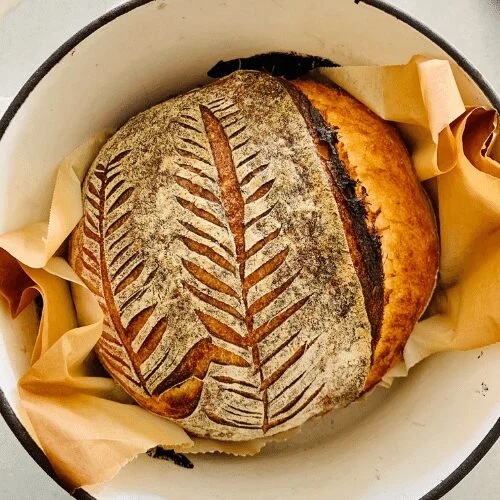
The crust bakes up golden and slightly blistered, while the inside stays chewy and light with those classic air pockets. Every slice feels rustic and homemade in the best way.
This recipe might look detailed at first, but once you understand the rhythm of it, it becomes almost second nature. Most of the time is hands-off, letting the dough rest and develop.
Whether you’re new to sourdough or refining your technique, this recipe gives you a reliable, bakery-style loaf right from your own kitchen.
Why I Keep Making This Sourdough Bread
This is the kind of recipe that becomes part of your routine once you try it. There’s something incredibly satisfying about turning simple ingredients into a loaf of bread that looks and tastes like it came from a bakery.
The flavor is what really keeps me coming back. That slight tang from the natural fermentation gives the bread depth, making it more interesting than standard loaves.
I also love the texture. The crust develops a beautiful crispness, while the inside stays soft and chewy with just the right amount of structure.
Another reason this recipe stands out is how flexible it is. You can adjust fermentation time, shaping, and even flour types as you get more comfortable with the process.
It’s not just about the final loaf, it’s about the process itself. Once you get into the rhythm, it becomes a relaxing and rewarding part of your kitchen routine.
How to Make Sourdough Bread?
Ingredients
- 500 g bread flour
- 350 g water
- 50 g sourdough starter
- 10 g salt
Equipment
- Mixing bowl
- Digital scale
- Banneton
- Dutch oven
- Dough scraper
Instructions
Step 1:
Combine the sourdough starter and water in a large bowl, mix briefly, then add the flour and salt and stir until a rough, shaggy dough forms.
Step 2:
Cover the bowl and let the dough rest so it can hydrate and begin developing structure before further handling.
Step 3:
Begin forming the dough by stretching and folding it over itself repeatedly until it becomes smoother and more elastic.
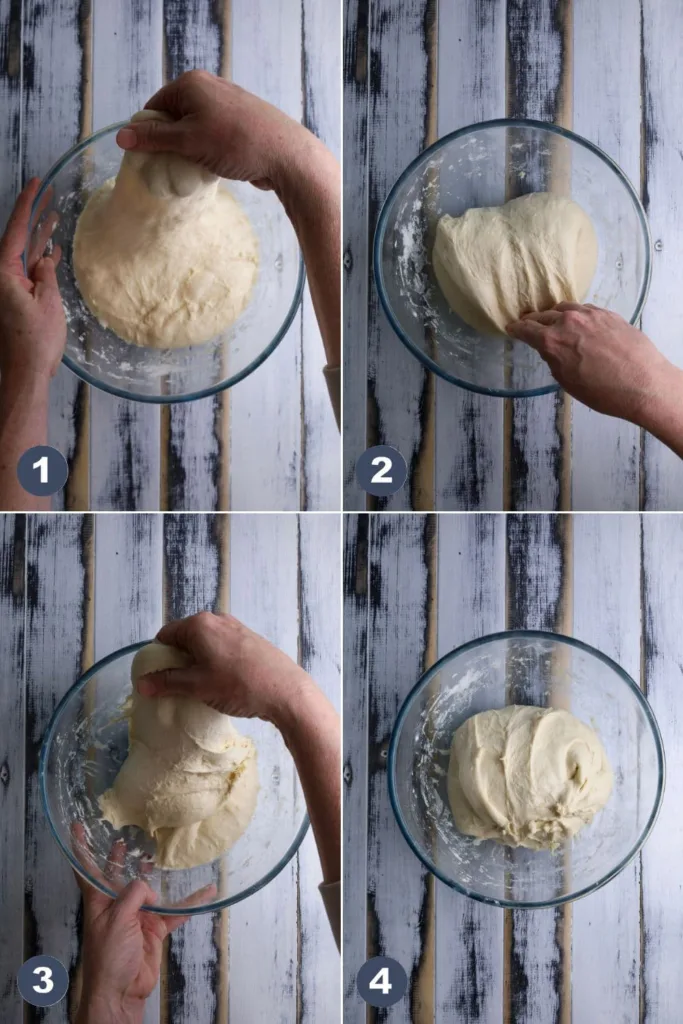
Step 4:
Continue strengthening the dough by performing several rounds of stretch and folds over time, allowing rests in between each set.
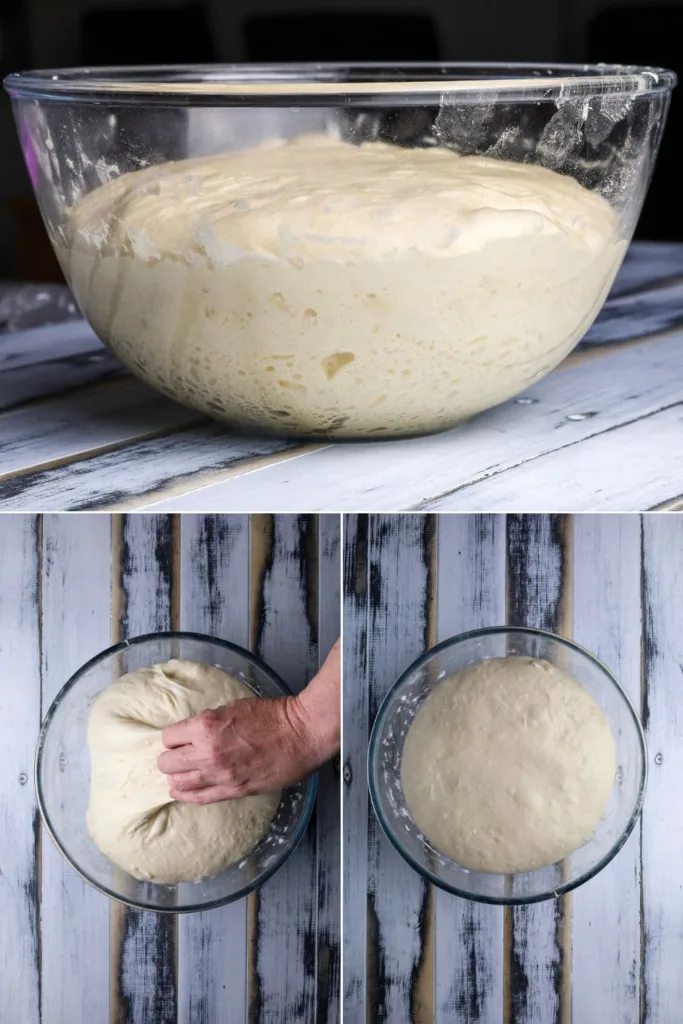
Step 5:
Let the dough bulk ferment until it has roughly doubled in size and shows visible air bubbles throughout.
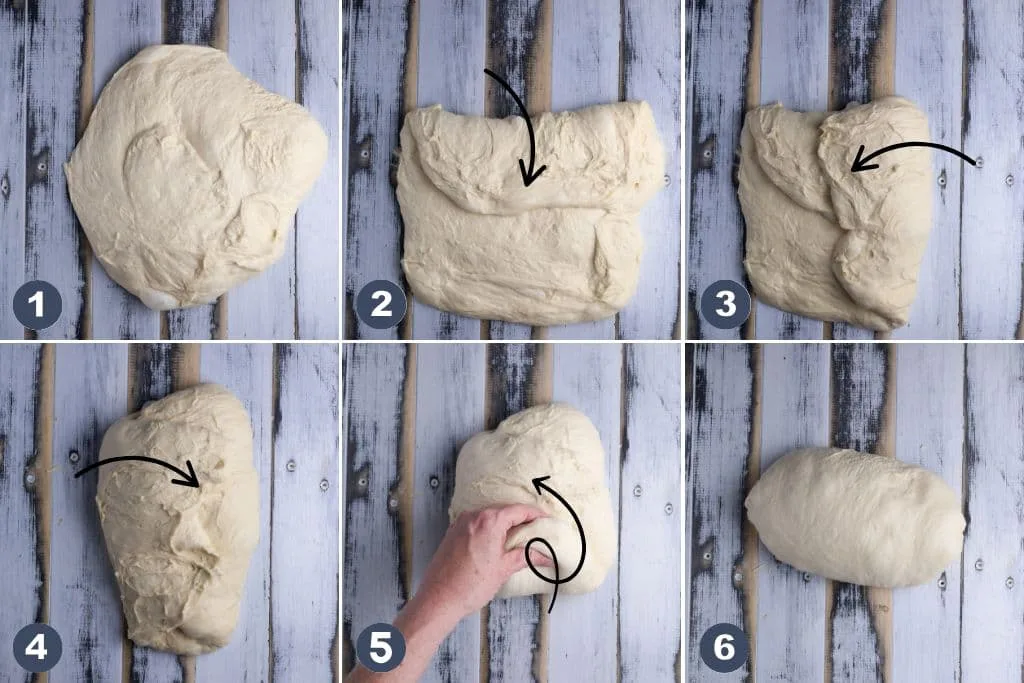
Step 6:
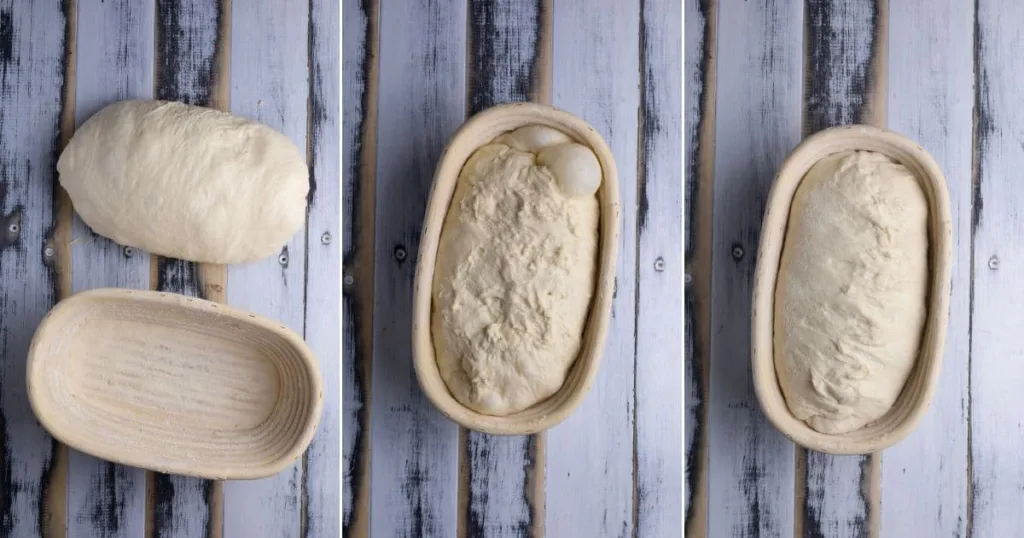
Gently shape the dough into your desired form, creating surface tension while handling it carefully to avoid deflating it.
Step 7:
Place the shaped dough into a floured banneton, cover it, and refrigerate for a cold fermentation period.
Step 8:
Preheat the oven with the Dutch oven inside until very hot, keeping the dough chilled until ready to bake.
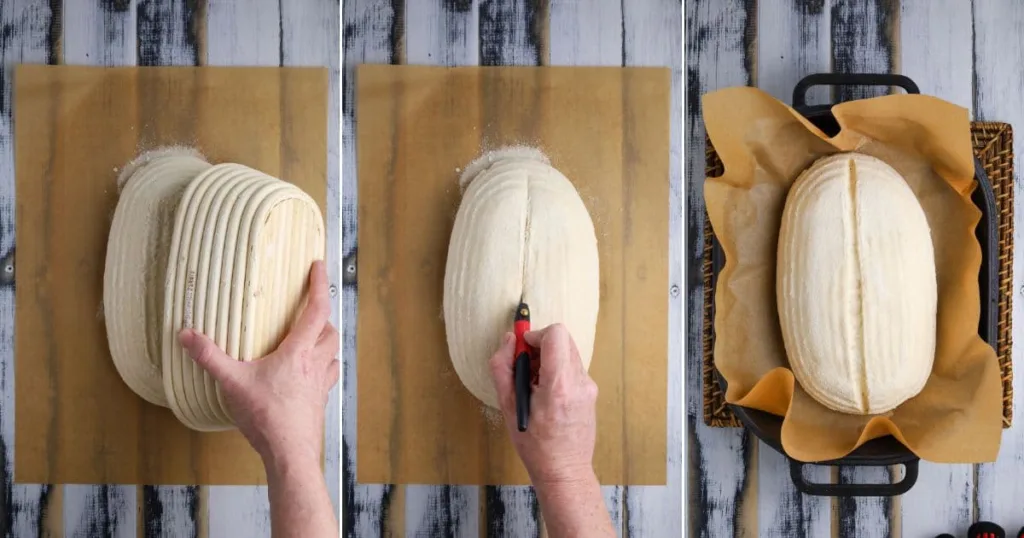
Step 9:
Transfer the dough onto parchment paper, score the top, and carefully place it into the hot Dutch oven.
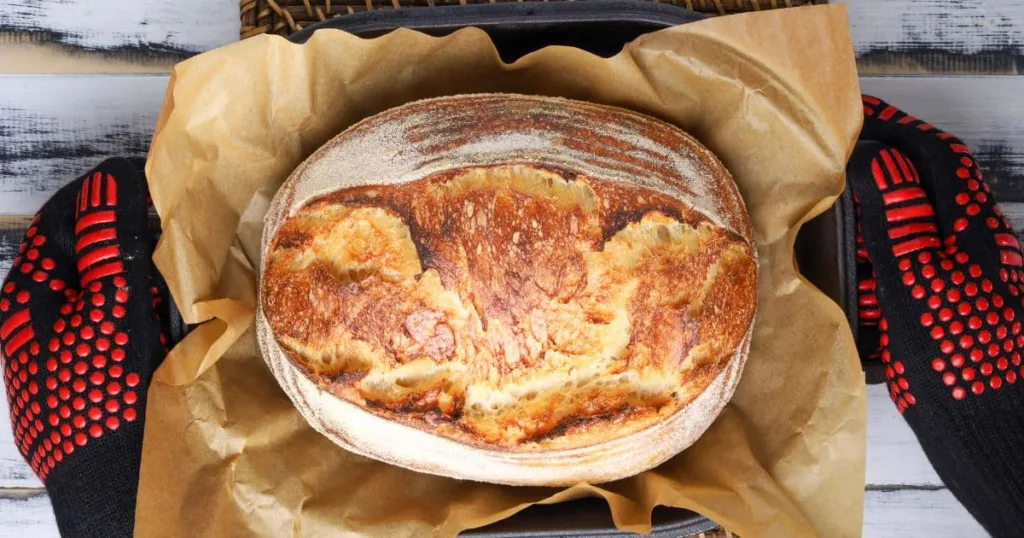
Step 10:
Bake covered first, then uncover and continue baking until the crust becomes deep golden and crisp.
Step 11:
Remove the bread from the Dutch oven immediately and let it cool completely on a wire rack before slicing.
Variations You Can Mess Around With
- Add seeds like sesame or sunflower for extra texture.
- Mix in herbs like rosemary for added flavor.
- Use whole wheat flour for part of the flour.
- Add olives or dried tomatoes for a savory twist.
- Shape into smaller rolls instead of one loaf.
- Add a touch of honey for slight sweetness.
- Experiment with longer cold fermentation for deeper flavor.
Pro Tips for Perfect Results
- Use a digital scale for accuracy. Sourdough depends on precise measurements.
- Make sure your starter is active. It should be bubbly and recently fed.
- Do not rush fermentation. Time helps develop both flavor and structure.
- Keep the dough covered properly. This prevents it from drying out.
- Handle the dough gently when shaping. This preserves air bubbles inside.
- Preheat your Dutch oven thoroughly. A hot pot helps create a good rise.
- Let the bread cool completely before slicing. This keeps the texture intact.
Sourdough Bread Recipe
Ingredients
Equipment
Method
- Combine the sourdough starter and water in a large bowl, mix briefly, then add the flour and salt and stir until a rough, shaggy dough forms.
- Cover the bowl and let the dough rest so it can hydrate and begin developing structure before further handling.
- Begin forming the dough by stretching and folding it over itself repeatedly until it becomes smoother and more elastic.
- Continue strengthening the dough by performing several rounds of stretch and folds over time, allowing rests in between each set.
- Let the dough bulk ferment until it has roughly doubled in size and shows visible air bubbles throughout.
- Gently shape the dough into your desired form, creating surface tension while handling it carefully to avoid deflating it.
- Place the shaped dough into a floured banneton, cover it, and refrigerate for a cold fermentation period.
- Preheat the oven with the Dutch oven inside until very hot, keeping the dough chilled until ready to bake.
- Transfer the dough onto parchment paper, score the top, and carefully place it into the hot Dutch oven.
- Bake covered first, then uncover and continue baking until the crust becomes deep golden and crisp.
- Remove the bread from the Dutch oven immediately and let it cool completely on a wire rack before slicing.
Notes
Nutrition Information
| Nutrient | Amount per Serving |
|---|---|
| Calories | 185 kcal |
| Carbohydrates | 37 gm |
| Fat | 1 gm |
| Protein | 6 gm |
Note: Nutritional values are approximate and may vary depending on ingredient size, quality, brand, location, and the proportions used. All nutritional information is calculated on a per-serving basis.
If you are following a medically restrictive diet, please consult your doctor or registered dietitian before preparing this recipe for personal consumption.
Common Mistakes to Avoid
- Using an inactive starter. This results in poor rise and dense bread.
- Skipping proper fermentation time. This affects both texture and flavor.
- Overhandling the dough. This can knock out important air bubbles.
- Not preheating the Dutch oven. This reduces oven spring.
- Cutting the bread too soon. This can make the crumb gummy.
- Adding too much flour while shaping. This affects texture.
- Ignoring dough temperature. This impacts fermentation speed.
How I Like to Serve These
- Slice and serve with butter while slightly warm.
- Use for sandwiches with fresh fillings.
- Toast and top with avocado or eggs.
- Pair with soups and stews.
- Serve with olive oil and herbs.
- Use leftovers for homemade croutons.
Storage / Leftovers and Next-Day Thoughts
- Store at room temperature in a bread bag.
- Avoid refrigerating as it dries the bread out.
- Keeps fresh for a few days.
- Toast slices to refresh texture.
- Freeze slices for longer storage.
- Let frozen slices thaw naturally.
- Flavor deepens slightly the next day.

I’m Emma Parker, the writer and founder behind Emma’s Home Guide. This blog was created to share practical ideas, honest experiences, and helpful guidance for everyday living. My goal is to make home life feel easier, warmer, and more enjoyable, without pressure or perfection.